Today we’re going to look at how to create robots.txt so that your site is indexed better on Google! Imagine this: you’ve just created an incredible website, full of great content and you’re ready to win over customers and fans.
However, there’s something wrong and it’s not showing up on Google. Or there may be more things showing up than you’d like. How do you solve it?
In this article, we’ll understand how this file can be so powerful and important for your SEO strategy. Although it is an aspect of Technical SEO, it is much simpler than it seems.
So let’s unlock the secrets of robots.txt and turn you into a Google indexing master!
What is the robots.txt file?
A robots.txt file is a set of instructions that tells search engines which pages should and should not be crawled on a website. It guides crawler access, but should not be used to keep pages out of Google’s index.
Here’s an example of robots.txt from our site:
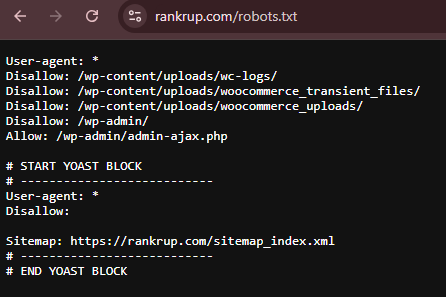
At first, its appearance can be daunting, I know. But take it easy, by the end of the article you’ll see that it’s much simpler than it looks.
It is a file used to send requests, in machine language, to the computer and bots that will crawl the site.
How do I find my site’s robots.txt?
Now let’s understand how to identify a robots.txt file on your site. It is hosted on your server, just like any other file on your site.
You can view the robots.txt file of any website by typing in the full URL of the homepage and adding “/robots.txt” at the end.
Like this : “https://rankrup.com/robots.txt”
You can try it on your site!
How does it work?
Robots.txt files tell search engine bots which URLs to crawl and, more importantly, which to ignore.
As they crawl web pages, search engine bots discover and follow links. This process takes them from site A to site B to site C via links, pages and sites.
However, if a bot finds a robots.txt file, it will read it before doing anything else.
You assign rules by identifying the “user agent” (search engine bot) and specifying the directives (rules). To do this, you need to know the name or code of the bot responsible for the search engine for which you want to create specific rules.
If you want to apply general rules to all bots, you can use an asterisk (*), as in our robots.txt example shown above.
What is it for?
A robots.txt file helps manage web crawler activity so that they don’t overload your site or bother with pages that shouldn’t be displayed to the public.
Check out more details on the functions of robots.txt.
Optimizes the tracking budget
The crawl budget refers to the number of pages that Google will crawl on your site in a given period.
The number can vary according to the size, health and number of backlinks on your site.
If the number of pages on your site exceeds your site’s crawl budget, you may have important pages that can’t be indexed.
These unindexed pages will not be ranked. Which means you’ve wasted time creating pages that users won’t see.
Blocking unnecessary pages with robots.txt allows Googlebot (Google’s web crawler) and bots from other search engines to spend more crawl budget on important pages.
Blocks duplicate and non-public pages
Crawler bots don’t need to examine every page on your site. Because not all of them are designed to appear on search engine results pages (SERPs), such as:
- internal search results pages;
- duplicate pages;
- login pages;
- test sites.
Some content management systems take care of these internal pages for you.
WordPress, for example, automatically disables the “/wp-admin/” login page for all crawlers. This prevents anyone from easily accessing your site’s login page.
There are also other security measures that make it possible to customize the access URL, offering more security for the site.
Hiding resources
Sometimes you want to exclude resources such as PDFs, videos and images from search results.
You can do this to keep them private because they are intended for lead generation or so that Google can focus on more important content.
In both cases, robots.txt prevents them from being tracked.
How to create robots.txt in 4 steps
You can use a robots.txt generation tool or you can create your own from scratch!
Here’s how to create one from scratch:
1. Create a file and name it Robots.txt
Start by opening a .txt document in a text editor, such as notepad, or a web browser.
Be careful at this point! Don’t use a word processor like Word, for example. It usually saves files in a proprietary format that can add random characters. This can make it difficult for crawlers to read robots.txt.
Once created, name the document “robots.txt”. Now you’re ready to start describing the instructions!
2. Describe the instructions in the robots.txt file
A robots.txt file consists of one or more groups of instructions. And each group consists of multiple lines of instructions.
Each group starts with a user agent and has the following information:
- Who the group applies to (the user agent);
- Which directories (pages) or files the agent should access;
- Which directories (pages) or files the agent should not access;
- A site map (optional) to tell search engines which pages and files you consider important;
- Trackers ignore lines that do not match these directives.
In the example below, we don’t want Google to crawl your “/shop/” directory because it’s for internal use only.
The first group would look something like this:
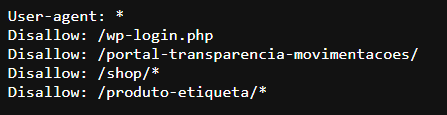
Above you can see that there are a few more pages that won’t be indexed. Therefore, the other instructions are added on a separate line below.
Once you’ve finished all the general and specific instructions, just add your sitemap.
Then save your robots.txt file. And remember that it must be called “robots.txt”.
If you don’t know what your sitemap is, you can use a tool to generate it.
3. Upload the Robots.txt file
Once you have saved the robots.txt file on your computer, upload it to your website and make it available for search engine crawling.
Unfortunately, there is no universal tool for this stage.
Uploading the robots.txt file depends on the file structure and web hosting of your site.
You can contact your hosting provider to find out how to send your robots.txt file to your site.
In the case of WordPress, there are some simpler ways of doing this using the Yoast SEO plugin.
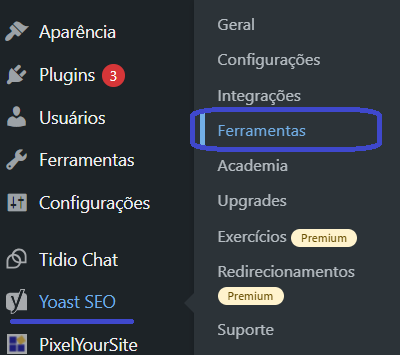
After that, just click on “File editor” and two files will appear: robots.txt and .htaccess.
Be very careful in this regard because htacess is a very important file that will guide other functionalities of the site. So, if you don’t have the necessary knowledge, don’t make any changes, as it could break your site!

If you haven’t already, you can generate your robots.txt file there. However, if you want to make any changes, you can do so via this feature.
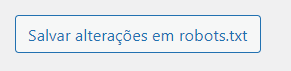
Once you have made your changes, you will need to click on the “Save changes” button to update the file.
4. Test your Robots.txt file
First, test that your robots.txt file is publicly accessible (i.e. that it has been uploaded correctly).
You can do this by opening an incognito window in your browser and typing in the URL of your site followed by “robots.txt”.
For example, “https://rankrup.com/robots.txt”
If you see your robots.txt file with the added content, you’re ready to test the markup (HTML code).
You can do this from the robots.txt report in Google Search Console. If you haven’t linked your site to your Google Search Console account, you’ll need to add a property first.
Conclusion
Mastering the use of the robots.txt file may seem like a complicated task at first glance, but with a little practice, it becomes a powerful tool for optimizing the indexing of your site by Google.
From helping you manage your crawl budget to blocking unnecessary or duplicate pages, robots.txt gives you significant control over how search engine bots interact with your site.
Always remember to test your robots.txt file after setting it up and uploading it to ensure that it is accessible and working correctly. This will ensure that your site is crawled as efficiently as possible, helping to improve your visibility in search results.
You can also combine the use of robots.txt with other SEO best practices to get the best possible results. See you in the next article! 😉